Connectivity, Installation Instructions
SCG-401K Step by Step Installation Instructions
01
Jun
Jun
Tools Needed: 1 pliers (needle nose pliers), 5/16” nut driver and a flat blade screwdriver (optional).
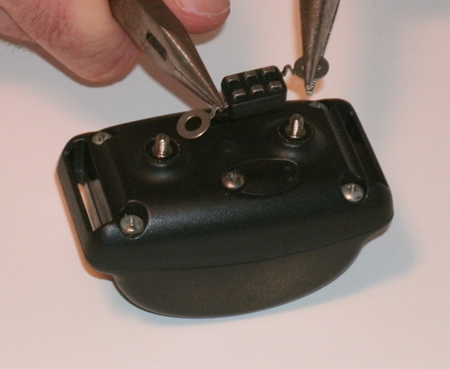
STEP 1: Remove the contact points.

- The contact points on some receivers are screwed on , and some are screwed in.
- If the contact points are screwed on then the studs will remain on the receiver, as in the example.
- If the studs come off with the contact points then use the appropriate studs that are provided. There are two sizes provided.
STEP 2: Form the SCG-401K to fit on the receivers studs.

The SCG-401K may fit the receiver without any adjustments.
You may have to use the pliers to bend and stretch the eyelet to make the SCG-401K fit.
STEP 3: Place the nylon washers, then fit the SCG-401K over the studs.

If you are using the most recent Dogtra models place the nylon washers on the studs before tightening down the acorn nut. This ensures the grid fully engages the housing surface so it works correctly.
STEP 4: Once the SCG-401K fits over the studs, place the insulated acorn nut and tighten.

STEP 5: Adjusting the height of the SCG-401K is simple.
- Put the grid on the studs and place the insulated nuts on one turn.
- Slide a flat blade screwdriver blade between the SCG-401K and the housing.
- Tighten the nuts. Note: the height of the SCG-401K is determined by the thickness of the Screwdrivers blade.